So what did you do to your SHO today!?

Disclaimer: Links on this page pointing to Amazon, eBay and other sites may include affiliate code. If you click them and make a purchase, we may earn a small commission.

marius883

SHO Member
Joined
Aug 28, 2015
Messages
453
Reaction score
324
Location
Orlando, FL
Good thing about warranty is you pay only deductible. Bad thing is, the warranty on an underwarranty repair only lasts as long as the warranty. If OOP, now it is 2 yrs/unlimited miles. But seriously, 2 years is a way short life expectancy for new OEM parts like these.

The "manual/pressure" bleeding is pretty standard stuff. The HCU bleeding requires a diagnostic routine to be run, and for that you need IDS or a high-level scan tool.

IDK if the "find a gravel road, brake hard enough to activate ABS, a few times" method will work in these cars also.

From a 2014 Taurus FSM, but you get the idea

Brake System Bleeding


General Equipment
Brake/Clutch System Pressure Bleeder/Filler
Fluid Container and Hose

Pressure

WARNING: Do not use any fluid other than clean brake fluid meeting manufacturer's specification. Additionally, do not use brake fluid that has been previously drained. Following these instructions will help prevent system contamination, brake component damage and the risk of serious personal injury.


WARNING: Carefully read cautionary information on product label. For emergency medical information seek medical advice. In the USA or Canada on Ford/Motorcraft products call: 1-800-959-3673. For additional information, consult the product Material Safety Data Sheet (MSDS) if available. Failure to follow these instructions may result in serious personal injury.

WARNING: Do not allow the brake master cylinder to run dry during the bleeding operation. Master cylinder may be damaged if operated without fluid, resulting in degraded braking performance. Failure to follow this instruction may result in serious personal injury.

NOTICE: Do not spill brake fluid on painted or plastic surfaces or damage to the surface may occur. If brake fluid is spilled onto a painted or plastic surface, immediately wash the surface with water.

NOTE: Pressure bleeding the brake system is preferred to manual bleeding.

NOTE: The HCU bleeding procedure must be carried out if a new HCU has been installed.

All Vehicles

  1. NOTE: Make sure the area around the master cylinder cap is clean and free of foriegn material.
  1. Fill the reservoir with clean, specified brake fluid. Refer to Specifications in this section.
  1. NOTE: Master cylinder pressure bleeder adapter tools are available from various manufacturers of pressure bleeding equipment. Follow the instructions of the manufacturer when installing the adapter.

    Install the bleeder adapter to the brake master cylinder reservoir and attach the bleeder tank hose to the fitting on the adapter.
  1. NOTE: Make sure the bleeder tank contains enough specified brake fluid to complete the bleeding operation. Refer to Specifications in this section.

    Open the valve on the bleeder tank.
    • Apply 207-345 kPa (30-50 psi) to the brake system.
  1. With the vehicle in NEUTRAL, position it on a hoist. Section 100-02 .
  1. Bleeding steps must be followed in the order indicated in the graphic.
  1. Loosen the bleeder screw 180° and leave open until clear bubble free brake fluid flows and then tighten the bleeder screw.
Vehicles with rear integral parking brake calipers

  1. NOTE: Due to the complexity of the fluid path within the rear integral parking brake calipers, it is necessary to press and release the parking brake during the bleed procedure.

    Apply and release the parking brake 5 times. Loosen the rear bleeder screw. Leave open until clear, bubble-free brake fluid flows, then tighten the rear bleeder screw.
    • Repeat until clear, bubble-free fluid comes out.
All vehicles

  1. Tighten the bleeder screw to specification. Refer to Specifications in this section.
    • Remove the fluid container and hose.
  1. Repeat steps 7-13 at the remaining wheel ends.
  1. Close the bleeder tank valve and release the pressure. Remove the tank hose from the adapter and remove the adapter.
  1. Fill the reservoir with clean, specified brake fluid. Refer to Specifications in this section.
Hydraulic Control Unit (HCU) Bleeding

NOTE: The HCU bleeding procedure must be carried out if a new HCU has been installed.

NOTE: Pressure bleeding the brake system is preferred to manual bleeding.

  1. Follow the pressure bleeding or manual bleeding procedure steps to bleed the system.
  1. Connect the diagnostic scan tool and follow the ABS Service Bleed instructions.
  1. Repeat the pressure bleeding or manual bleeding procedure steps to bleed the system.

So there is a 2 year warranty on the parts? They replaced the brake booster and the HCU unit but that was 2 years ago last month, so I guess I’m out of luck. I’m out of warranty now, so I guess I’m stuck having to pay hundreds of dollars to sort this out.

What would you think is the most likely culprit? The master cylinder or the brake booster?
 

SHOdded

SHO Member
Joined
Dec 25, 2011
Messages
9,047
Reaction score
4,393
Location
Maryland
usually the booster, but the master cylinder can leak into the booster, causing the booster to fail. This has happened on the SHO, specifically. Either way, the booster would need to come out, and if there is fluid in there, the master cylinder would need to be replaced as well. Certainly, the MC can be bench tested to verify a problem.

Since this issue only started with brake installation though, I suspect air in the lines, so bleeding the system (including ABS) is the logical first step.
 

marius883

SHO Member
Joined
Aug 28, 2015
Messages
453
Reaction score
324
Location
Orlando, FL
I’m gonna take it to a shop and let them diagnose it, because right now the pedal goes to the floor, I don’t feel safe driving it. Since I work for a rental car company, I’m gonna take a Camaro SS for a few days. :cool:
 

marius883

SHO Member
Joined
Aug 28, 2015
Messages
453
Reaction score
324
Location
Orlando, FL
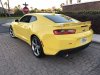
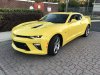
Picked up my rental car, 2018 Camaro SS!
Thing is seriously fast, 455hp 455tq. Pulled a 0-60 in 4.2 first time I tried the 0-60 timer :biggrin:
 

Attachments

  • 4EE3744F-1D54-4A22-BD6A-E62F15B38068.jpeg
    4EE3744F-1D54-4A22-BD6A-E62F15B38068.jpeg
    1.9 MB · Views: 41
  • A1739AEB-BD69-43C4-AC1E-BFF9668E5AAE.jpeg
    A1739AEB-BD69-43C4-AC1E-BFF9668E5AAE.jpeg
    2.2 MB · Views: 40

Hawkeye13

Member
Joined
Sep 7, 2017
Messages
49
Reaction score
62
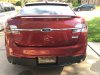
Did some upbadging.

Due to the factory stance or lift kit. God, I love the car but hate the stance!!! So, I am going to swipe this from my wife’s 2016 jeep GC trailhawk.

Just playing. Seriously, though I got my new tires mounted and balanced. Also, got my livewire ts tuner and updated it.
 

Attachments

  • 51C940D8-FB03-4FE8-B157-41F0369A2DFC.jpeg
    51C940D8-FB03-4FE8-B157-41F0369A2DFC.jpeg
    1 MB · Views: 28

OG-SHOguy

Same as JBeck
Joined
Sep 7, 2017
Messages
218
Reaction score
167
Location
Houston, TX
Need to post some serious pics after teasing us with all that work!
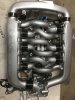
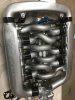
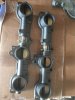
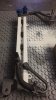
I broke a cam cover bolt so i gotta go back in and fix it but here are some pics of how everything came out... im pretty happy with it!
 

Attachments

  • 36433F21-1D57-43C2-B615-DEFDC317A5F5.jpeg
    36433F21-1D57-43C2-B615-DEFDC317A5F5.jpeg
    1.6 MB · Views: 71
  • 6DDB1043-6AFB-475A-8C79-5D5CC76BCC0B.jpeg
    6DDB1043-6AFB-475A-8C79-5D5CC76BCC0B.jpeg
    1.5 MB · Views: 71
  • 381F47D9-7AAD-42FA-9F4A-84284CF84BB9.jpeg
    381F47D9-7AAD-42FA-9F4A-84284CF84BB9.jpeg
    1.7 MB · Views: 78
  • 9313DB82-0113-4604-8937-65E80CC07ED9.jpeg
    9313DB82-0113-4604-8937-65E80CC07ED9.jpeg
    612.2 KB · Views: 64

OG-SHOguy

Same as JBeck
Joined
Sep 7, 2017
Messages
218
Reaction score
167
Location
Houston, TX
Looks nice, how did you paint it and what color is that
The silver is ceramic caliper paint ( very durable) and the darker grey is cast iron paint. I had those left over from a different project and plenty of it so i used it and it came out what i wanted... i am storm troopering out my SHO so the colors will complement the Oxford White nicely i think. Im going to black out the jubile clamps in high gloss black so they disappear into the silicon coupling gaskets... i tore everything doun to its lowest point and cleaned and beadblasted everything before paint.
 

OG-SHOguy

Same as JBeck
Joined
Sep 7, 2017
Messages
218
Reaction score
167
Location
Houston, TX
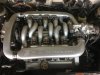
Ok, i got the SHO all back together on the top side... now i need to dive into the bottom side... man this thing is bleeding to death! Front main, rear main, and oil lvl sensor .... all leaking!!

Anyway, here are some pics so far!
 

Attachments

  • FC3D8FD3-840D-4544-8B37-38BB7BCD39AB.jpeg
    FC3D8FD3-840D-4544-8B37-38BB7BCD39AB.jpeg
    2.1 MB · Views: 31
  • 655B06E6-8E51-4B28-BA95-C6E00CD78FD2.jpeg
    655B06E6-8E51-4B28-BA95-C6E00CD78FD2.jpeg
    2.1 MB · Views: 33
  • 335BBD5A-FEBD-49F0-A8DE-FDF6F63B0C80.jpeg
    335BBD5A-FEBD-49F0-A8DE-FDF6F63B0C80.jpeg
    1.9 MB · Views: 34
  • 184E03EE-BE34-4988-99EC-3A3975440A7E.jpeg
    184E03EE-BE34-4988-99EC-3A3975440A7E.jpeg
    1.9 MB · Views: 30

marius883

SHO Member
Joined
Aug 28, 2015
Messages
453
Reaction score
324
Location
Orlando, FL
Got the car back from the shop last night, brake issue fixed! Pedal is rock hard now, had them bleed the whole system including the abs system as per @SHOdded suggestion. Cost me 129$, I’m happy:biggrin:
 

JimC

Member
Joined
Oct 11, 2016
Messages
67
Reaction score
45
Called to set up appointment for a new windshield. Had a lunch meeting and while walking to the SHO, spotted something on the windshield. Got up to the car and about a foot long crack on the passenger side. The guy with me said, "I would have noticed that on the way over."

No idea how or when it happened.

Sent from my SM-G950U using Tapatalk
 

SHOdded

SHO Member
Joined
Dec 25, 2011
Messages
9,047
Reaction score
4,393
Location
Maryland
Climate change. LOL. Yeah, these "sandwich" windshields give up the ghost pretty easy.
 

Hawkeye13

Member
Joined
Sep 7, 2017
Messages
49
Reaction score
62
Loaded my 91 octane tune from Brew City Boost after installing the new 3 map sensor and plugs. Definitely could tell a difference and improvement over stock. Time for some data logging soon. Needs a little shift point tweaking but pulls much harder now.
 

Johnbigdog

SHO Member
Joined
Feb 17, 2017
Messages
1,417
Reaction score
1,703
Location
michigain
Called to set up appointment for a new windshield. Had a lunch meeting and while walking to the SHO, spotted something on the windshield. Got up to the car and about a foot long crack on the passenger side. The guy with me said, "I would have noticed that on the way over."

No idea how or when it happened.

Sent from my SM-G950U using Tapatalk

If it makes you feel better I have gone through 3 in the last three months.
 

Sholab1

SHO Member
Joined
Apr 27, 2016
Messages
375
Reaction score
332
Location
United States
Getting her ready for winter, Changing plugs. Cleaned out the K&N Filter, removed those remaining hitchhikers

20171111_072626_zpsqiy8kmui.jpg

20171111_072236_zpsuc24q2il.jpg
20171111_072356_zpslpvxfjxt.jpg
 
Back
Top