========================
Diving in
Took the opportunity of the cold wave hitting PS (only a high of 102 today) to work on the Gen3 SHO
Looked under the driver’s side dash at the fuse box, I pulled ABS fuse #9 10A and tested w/ Fluke meter for continuity, tested fine. Sprayed DeOxitD5 on prongs and replaced.
View attachment 95204
ABS 10A mini fuse pulled from fuse block located under driver's side dash over parking brake pedal
Next popped the hood and removed the brand new Interstate Battery (2 wks old) because I was going to be fooling with the power distribution block high power fuses and manual said it was a good idea to disconnect the battery, so I did.
Son-of-a-gun this car drained a BRAND NEW (I trickled charged it until it was 100% before installing it 2 wks ago at mechanics house before driving it 70 miles home) 2 week old battery down BELOW 80%! Just sitting parked! So that means I’m going to let it trickle overnight in the tool shed tonight before re-installing it tomorrow (because I live in a condo w/ a carport, and don't have a dedicated garage).
On to the high-powered fuses. Opened the power distribution block, pulled the 40 amp ABS M.A.X.I. (gatekeeper software doesn't like the term) fuse #13 and tested w/ Fluke meter for continuity, tested fine. Sprayed DeOxitD5 on prongs and replaced.
View attachment 95205
Pulling out the ABS 40A M.A.X.I. fuse (I use periods due to gatekeeper software redaction otherwise)
Finally pulled the 30 amp ABS mini fuse #18 and tested w/ Fluke meter for continuity, tested fine. Sprayed DeOxitD5 on prongs and replaced.
View attachment 95206
ABS 30A mini fuse #18
So I’ve systematically eliminated the fuseable links as possible source of the electrical gremlins, that only now leaves the main ABS unit and connector.
The ABS unit is located UNDERNEATH the battery tray, which is held in place by 4 x 10mm bolts. What isn’t obvious is there is a covered power sub-block clipped on to the right side of the battery tray that you need to wrangle loose, and there is a ball-tipped prong attached to the airbox that pokes thru a rubber grommet at the top right corner of the battery tray to hold it steady in place that is a bee-atch to unfasten. You need to lift from the bottom left corner up first, then tilt and rotate so you can un-fasten and push out the ball-tipped prong from its rubber grommet. Once I got the tray out, I was faced with a 10mm hex nut locking down thru the center of the harness plug the ABS wiring to the control unit.
View attachment 95207
Power sub block on right under 2 clips that is held in place by battery tray, need to wrangle it away while staying attached
View attachment 95208
Rubber grommet on battery tray
View attachment 95209
Ball tipped prong attached to airbox that fits into rubber grommet on battery tray
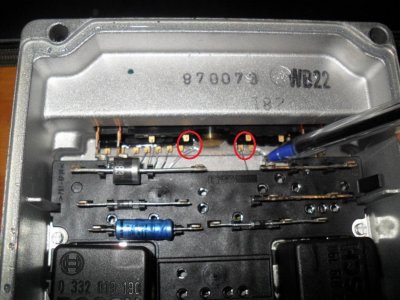
I noticed that there is a protective plastic cap on top of the connector that is held down by 4 grooved slats w/ a clip at the end. One of the slats was OUTSIDE its grooves, and it could have twisted the connector or caused it to have a sufficiently tenuous connection to go hinky (I’m hoping). I start wrenching, and wrenching, and wrenching, and wrenching…this plug is in there good! Took a good number of turns to back out that bolt, and I FINALLY got the plug separated. I doused both the male side (connected to the car) and female side with DeOxitD5 and separated the top protective cap then re-installed w/ all 4 grooved slats correctly seated and clipped down before re-attaching the two halves of the ABS controller plug and wrench back together.
View attachment 95210
What I saw after lifting out the battery tray
View attachment 95211
Notice left plastic guide outside of tracks compared to right side and how left side of plug is slightly higher
View attachment 95212
Unfastened ABS Controller plug after many, many, many cranks on the 10mm hex center lock nut
View attachment 95213
Better focus on male side plug ABS controller
View attachment 95214
Female side of ABS controller plug
View attachment 95215
DeOxITD5 doused male plug on ABS controller
View attachment 95216
1999 (SHO only) ABS controller part number stamped on Bosch 927
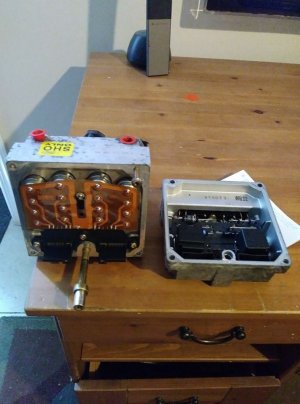
I replaced the battery tray, and put everything away, waiting for the trickle charge to come back up to 100% (hopefully overnight will do it, otherwise I will have to wait another week to get back under the hood).
View attachment 95217
Back together for now, waiting on trickle charger to top up battery for re-install and testing
TO BE CONTINUED…


")