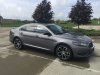
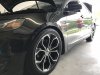
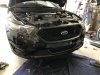
So what did you do to your SHO today!?

Disclaimer: Links on this page pointing to Amazon, eBay and other sites may include affiliate code. If you click them and make a purchase, we may earn a small commission.

Lostneye

SHO Member
Joined
Feb 23, 2017
Messages
1,281
Reaction score
1,105
Location
NY
Weather has been getting cooler here in CHI-Town at night (like mid 40's, lower 50's) and desiring to pick on some lowly Porsche, Corvette, Charger SRT owners, etc.....

What I did to my SHO today was run it down to almost "E" / Empty, and then dumped 10 gallons of MS109 into the SHO's tank and uploaded the custom LOWER 525awhp track file from LMS.

I want to see them cry at the next light knowing they purchased what they did, and got eaten alive by a LARGE 4 door grocery getter.

Time to play.

Muahahahahahahaha

Sent from my SM-N920V using Tapatalk
Go get em.

I hope I can get a cold dry day that I can make it to the track before they close.
 

GIGANTORE

Member
Joined
Sep 26, 2017
Messages
58
Reaction score
48
I look forward to TX winter here. all that cold air rushing the turbos....will be play time
Florida too. It’s so damn hot and humid down here that turbo cars never see their potential. Can’t wait to get the meth kit in. All that nonsense won’t matter anymore. Gonna be a forecast of “turbo weather” for the rest of this cars life.
 

marius883

SHO Member
Joined
Aug 28, 2015
Messages
453
Reaction score
324
Location
Orlando, FL
Installed the new EBC rotors today, managed to get all 4 rotors on, but we could not get the screws off that hold in the pads on the front passenger side.
Also couldn’t compress the rear rear brakes enough to get the new pads on. So currently I have the new rotors on with the old power stop pads in the rear, and the Ford pad on the left front. Guess I’m gonna have to take it to a shop to get the others done
 

marius883

SHO Member
Joined
Aug 28, 2015
Messages
453
Reaction score
324
Location
Orlando, FL
Managed to find a shop that will install my rear brake pads and the front right one that I couldn’t get on, for 75$. Also other great news, the vibration that I had at 65-75 mph is completely gone! :)
 

OG-SHOguy

Same as JBeck
Joined
Sep 7, 2017
Messages
218
Reaction score
167
Location
Houston, TX
removed upper side of motor to seal up some leaking seals, cleaned intake inside and out, painted the intake and runners with ceramic paint, cleaned and bead blasted Throttle Body and reassembled, disassembled secondaries and fully cleaned and reconditioned them and painted them with ceramic paint as well, ordered silicon intake couplings, pulled fuel rail, injectors...cleaned up rails and bead blasted them to receive ceramic paint as well...still need to finish
 

OG-SHOguy

Same as JBeck
Joined
Sep 7, 2017
Messages
218
Reaction score
167
Location
Houston, TX
Need to post some serious pics after teasing us with all that work!
i will definatley post some pics when i get it all back together....right now the whole upper motor is broken down as far as it can be....i mean every nut, bolt, e clip, ect...lol its a big puzzle right now but i should have it back together this weekend...im working on fuel rails tonight, after that, its just odds and ends to pretty up and reassemble.
 

marius883

SHO Member
Joined
Aug 28, 2015
Messages
453
Reaction score
324
Location
Orlando, FL
Had the rear brake pads and the front right brake pads put on today. Car stops way better, but the mechanic said the brake pedal is way too soft and sinks way too far down. He thinks the brake booster needs replacing. Quoted me 700$ :eeeeeek:
 

bpd1151

Lurking Around
Joined
Feb 21, 2010
Messages
3,133
Reaction score
6,672
Location
SHOcago 'Burbs
Since I replaced my booster with the help of my mechanic pal, I recall it took us less than 1hr from start to finish.

$700 seems high, as SHOdded pointed out, the part alone can be had for a tick over a hundo (& shipped at that).

What the **** is he charging for labor? $275 p/hr? Goodness.

Sent from my SM-N920V using Tapatalk
 

marius883

SHO Member
Joined
Aug 28, 2015
Messages
453
Reaction score
324
Location
Orlando, FL
Since I replaced my booster with the help of my mechanic pal, I recall it took us less than 1hr from start to finish.

$700 seems high, as SHOdded pointed out, the part alone can be had for a tick over a hundo (& shipped at that).

What the **** is he charging for labor? $275 p/hr? Goodness.

Sent from my SM-N920V using Tapatalk
I thought it sounded pretty nuts! He said it’s because he believes there’s air in the abs module, and he said he would have to take off the calipers and bleed out everything. I dno, sounds crazy still! Basically right now, my brake pedal is almost going to the floor. I checked my paperwork, they replaced the brake booster and abs module 2 years ago under warranty, stated that the abs module was leaking internally.

I guess either way I have to do something. $$$
 

SHOdded

SHO Member
Joined
Dec 25, 2011
Messages
9,047
Reaction score
4,393
Location
Maryland
Good thing about warranty is you pay only deductible. Bad thing is, the warranty on an underwarranty repair only lasts as long as the warranty. If OOP, now it is 2 yrs/unlimited miles. But seriously, 2 years is a way short life expectancy for new OEM parts like these.

The "manual/pressure" bleeding is pretty standard stuff. The HCU bleeding requires a diagnostic routine to be run, and for that you need IDS or a high-level scan tool.

IDK if the "find a gravel road, brake hard enough to activate ABS, a few times" method will work in these cars also.

From a 2014 Taurus FSM, but you get the idea

Brake System Bleeding


General Equipment
Brake/Clutch System Pressure Bleeder/Filler
Fluid Container and Hose

Pressure

WARNING: Do not use any fluid other than clean brake fluid meeting manufacturer's specification. Additionally, do not use brake fluid that has been previously drained. Following these instructions will help prevent system contamination, brake component damage and the risk of serious personal injury.


WARNING: Carefully read cautionary information on product label. For emergency medical information seek medical advice. In the USA or Canada on Ford/Motorcraft products call: 1-800-959-3673. For additional information, consult the product Material Safety Data Sheet (MSDS) if available. Failure to follow these instructions may result in serious personal injury.

WARNING: Do not allow the brake master cylinder to run dry during the bleeding operation. Master cylinder may be damaged if operated without fluid, resulting in degraded braking performance. Failure to follow this instruction may result in serious personal injury.

NOTICE: Do not spill brake fluid on painted or plastic surfaces or damage to the surface may occur. If brake fluid is spilled onto a painted or plastic surface, immediately wash the surface with water.

NOTE: Pressure bleeding the brake system is preferred to manual bleeding.

NOTE: The HCU bleeding procedure must be carried out if a new HCU has been installed.

All Vehicles

  1. NOTE: Make sure the area around the master cylinder cap is clean and free of foriegn material.
  1. Fill the reservoir with clean, specified brake fluid. Refer to Specifications in this section.
  1. NOTE: Master cylinder pressure bleeder adapter tools are available from various manufacturers of pressure bleeding equipment. Follow the instructions of the manufacturer when installing the adapter.

    Install the bleeder adapter to the brake master cylinder reservoir and attach the bleeder tank hose to the fitting on the adapter.
  1. NOTE: Make sure the bleeder tank contains enough specified brake fluid to complete the bleeding operation. Refer to Specifications in this section.

    Open the valve on the bleeder tank.
    • Apply 207-345 kPa (30-50 psi) to the brake system.
  1. With the vehicle in NEUTRAL, position it on a hoist. Section 100-02 .
  1. Bleeding steps must be followed in the order indicated in the graphic.
  1. Loosen the bleeder screw 180° and leave open until clear bubble free brake fluid flows and then tighten the bleeder screw.
Vehicles with rear integral parking brake calipers

  1. NOTE: Due to the complexity of the fluid path within the rear integral parking brake calipers, it is necessary to press and release the parking brake during the bleed procedure.

    Apply and release the parking brake 5 times. Loosen the rear bleeder screw. Leave open until clear, bubble-free brake fluid flows, then tighten the rear bleeder screw.
    • Repeat until clear, bubble-free fluid comes out.
All vehicles

  1. Tighten the bleeder screw to specification. Refer to Specifications in this section.
    • Remove the fluid container and hose.
  1. Repeat steps 7-13 at the remaining wheel ends.
  1. Close the bleeder tank valve and release the pressure. Remove the tank hose from the adapter and remove the adapter.
  1. Fill the reservoir with clean, specified brake fluid. Refer to Specifications in this section.
Hydraulic Control Unit (HCU) Bleeding

NOTE: The HCU bleeding procedure must be carried out if a new HCU has been installed.

NOTE: Pressure bleeding the brake system is preferred to manual bleeding.

  1. Follow the pressure bleeding or manual bleeding procedure steps to bleed the system.
  1. Connect the diagnostic scan tool and follow the ABS Service Bleed instructions.
  1. Repeat the pressure bleeding or manual bleeding procedure steps to bleed the system.
 
Back
Top