Water Pump/Phaser/Etc Job Helpful Advice or Tips

Disclaimer: Links on this page pointing to Amazon, eBay and other sites may include affiliate code. If you click them and make a purchase, we may earn a small commission.

WarrenBoostit

Member
Joined
Mar 17, 2023
Messages
75
Reaction score
18
Location
Minnesota
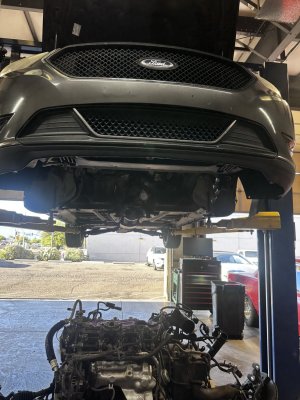
Hey all. I've had the SHO beached in our shop for a bit, waiting for me and my dad to have enough weekend free time to start cracking it open and doing pump and phasers. Never saw real visible weep but the Blackstone reports kept coming each 2k miles with more coolant being detected and the phasers were already rattling so it was time.

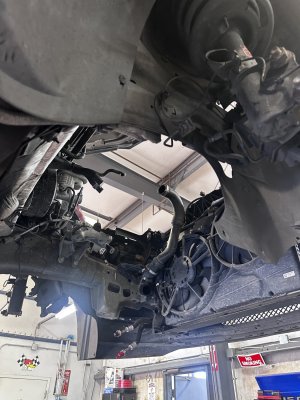
Just started cracking it open this past weekend, and oh boy. We're by no means master mechanics but my dad especially isn't a mechanical slouch either, and still it feels like we've spent these first 5-6 hours just fighting with wire harness plastic block attachments just to get to the point where the intake is off and the coolant reservoir is out. This'll definitely take us a few weekends. That said, more and more we're starting to consider being this deep, should we just go all out and catch the other things along the way? Should we go full engine out (which sounds like a bad and too complicated for the effort idea but would make things easier)?

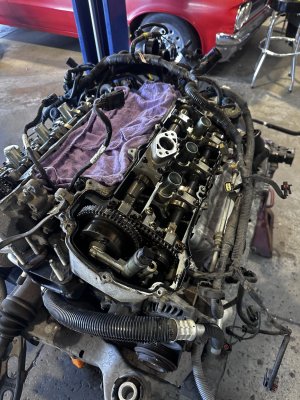
The SHO is at about 80k miles, and in past borescopes there seems to be some small signs of injector leak carbon buildup, as well as a rare cylinder 4 misfire. It seems wise at this point in time to just swap out injectors while we're here, but I've heard the installation process for this is very precise and doing this might add 6 more points of potential failure when we go to turn the key on again. Same feeling with carbon on the valves, it isn't miserable, but its there, and this is the most accessible its been. Even the turbos are being slightly considered given their potential to blow later on, but I admittedly haven't checked for shaft play yet to know the current condition.

Looking for your guys advice on what is worth it in this scenario and what is risky or too far without surefire issues. I have a bad habit of parts cannoning sometimes or jumping the gun on an issue too early. Also just looking for any helpful advice or tips and tricks for guys who've done jobs like this, like what to remove to make life easier, what or what not to reuse, or anything else. I've heard I may need to demount and raise one side of the block slightly for better access but I'm still trying to track all the helpful info down. Definitely looking to expand the lifespan of this engine in this work, but don't want to shrink my own in the process.


Black 2018 SHO Non-PP | GH e30 | PPE Catted Downpipes | DG2 Trans Mount | M-12405-35T plugs at .026 | H&R Springs | XDI-35 | Fuel-it Bluetooth ethanol analyzer | GH IC | EPP Gen2 CAI | Noisemaker delete | MSD coils | EPP Hot Pipes | Black AR924 w/ General GMAX AS 05 255/45r20 | MRT axle back w/black tips
 

Bronco2fan

SHO Member
Joined
May 30, 2017
Messages
596
Reaction score
632
Location
Texas
Plenty of write ups on this. It's one of those things that go, while you're in there , you might as well do it all. You only want to open it up once.
 

kryptto

The Best Thing About Cars... ones in my mirror.
Supporting Member
Joined
Mar 24, 2023
Messages
3,201
Reaction score
2,077
Location
South East, Florida
First I would do this if it was me:

you leave the engine in the car, but you remove the passenger-side engine mount. This allows you to place a floor jack (with a block of wood) under the oil pan. You can then carefully jack the engine up and down a few inches. This gives you the clearance needed to reach the timing cover bolts that are normally blocked by the frame rail.

If there is a known rare misfire on Cylinder 4 and visible signs of leaking, it’s time. Especially if this SHO is running an E30 fuel tune or any increased boost, those injectors are being pushed hard, and a failing injector can lean out a cylinder and crack a piston.

Direct Injection injectors use teflon seals that must be resized using a highly specific tool if you are reinstalling old ones. However, if you buy brand new OEM Motorcraft injectors, they typically come with the Teflon seals already installed and sized. This eliminates the hardest part of the job. Just make sure the bores are meticulously clean before seating the new ones.

Carbon on the Valves clean them while you are there. The Gen 1 EcoBoost is purely direct-injected. Without fuel washing over the back of the intake valves, oil vapor from the PCV system bakes onto them. Since the intake manifold is already off, this is the easiest it will ever be.

Don't just scrape them dry. Turn the crankshaft so the valves on the cylinder you are working on are completely closed. Use a specialized chemical solvent (like CRC GDI Valve Cleaner) to soak the carbon, then use soft picks. If they have an air compressor, doing a DIY walnut blast with a media blaster and a shop vac attachment is the safest, most professional way to get them factory clean.

The Turbos leave them alone unless proven bad. Pulling the turbos on the transverse SHO is a miserable job due to the firewall clearance. Since you have the intake pipes off, reach in and check the compressor wheels for shaft play (wiggling up/down and in/out). A tiny bit of side-to-side play is normal (oil pressure centers them when running), but if they are touching the housing or have in/out play, they need rebuilding. If they spin freely and aren't heavily leaking oil into the charge pipes, let them be.

Timing Vhain and Guides: Stretch is common. Replace the primary chain, tensioners, and all plastic guides.
Friction Washers: This is critical. Ford uses thin, diamond-coated friction washers behind the crank pulley and cam phasers to prevent them from slipping as there are no traditional keyways holding the timing gears in place. Do not reuse the old ones. If they slip, engine timing is destroyed.
Oil Pump you are right next to it. At 80k miles, throwing a new high-flow oil pump (or at least a new OEM one) in is very cheap insurance. If the car is tuned or driven hard, consider upgrading to billet oil pump gears, as the factory powdered-metal gears are a known weak point under high stress.
Special Tools: Make absolutely sure they have the Ford 3.5L Camshaft Holding Tool (often sold on Amazon or specialty auto sites). You cannot do this job with zip-ties and hope; the cams will snap out of position under valve spring pressure when you remove the phasers.
 

Texas Marauder

Supporting Member
Supporting Member
Joined
Jul 20, 2007
Messages
915
Reaction score
827
Location
Lone Star State
Friction Washers: This is critical. Ford uses thin, diamond-coated friction washers behind the crank pulley and cam phasers to prevent them from slipping as there are no traditional keyways holding the timing gears in place. Do not reuse the old ones. If they slip, engine timing is destroyed.
Hogwash!! Where did you get that info? The cams have index pins which align the phasers. The crankshaft has a keyway to align the crank gear.
Special Tools: Make absolutely sure they have the Ford 3.5L Camshaft Holding Tool (often sold on Amazon or specialty auto sites). You cannot do this job with zip-ties and hope; the cams will snap out of position under valve spring pressure when you remove the phasers.
Use large heavy duty tie straps to secure the cam lock tools to the cams. The tool will try to twist off the camshaft.


kryptto

The Best Thing About Cars... ones in my mirror.
Supporting Member
Joined
Mar 24, 2023
Messages
3,201
Reaction score
2,077
Location
South East, Florida
Hogwash!! Where did you get that info? The cams have index pins which align the phasers. The crankshaft has a keyway to align the crank gear.
You're right, I had bad intel on that specific part. I was looking at the smaller EcoBoost platforms that use friction washers instead of a keyway. Glad the 3.5 is indexed. Crossed that off the parts list. Anyway, getting back to the tear down this weekend... Let us know how it goes @WarrenBoostit
 

SpinalCoarse

Member
Joined
Apr 14, 2026
Messages
30
Reaction score
8
Location
Tucson, AZ
A shop pulled my engine out, get a new oil pump since you’re there. It looked like a chore, I had a warranty so I was alright
 

Attachments

  • IMG_2503.jpeg
    IMG_2503.jpeg
    307.5 KB · Views: 8
  • IMG_2500.jpeg
    IMG_2500.jpeg
    289.1 KB · Views: 8
  • IMG_2501.jpeg
    IMG_2501.jpeg
    391.8 KB · Views: 8

jgonza5

Member
Joined
Mar 26, 2019
Messages
58
Reaction score
58
Location
Gulf Coast
Along with the Oil Pump, might be a good time to change the thermostat, if still original, while coolant is drained. (don't forget gasket)

Also, the Crank Pulley Bolt is a TTY single use; I believe the cam phaser bolts are single use, but I'm not 100% sure.

Another special tool from the service manual are $$$ alignment pins (OTC 307-399) for the front cover re-install. (I am sure that most don't use them.)

Service Manual:
 

WarrenBoostit

Member
Joined
Mar 17, 2023
Messages
75
Reaction score
18
Location
Minnesota
Few weekends in, my father and I are a pretty meticulous and cautious and not super quick but I still am amazed I think this is quoted as a 16 hour job, feel bad for the poor sucker at a dealership that has to do this in that time. The initial battle is just getting every hose fuel line and wiring harness clip out of the way to actually get some room to breath. I'm 100% replacing these plastic harness block clips with zip ties when I put it back together, they are clearly made for production ease and not removal and make minor wiring harness translation a 15 minute endeavor on each one that wants to fight. Would much rather just cut and replace a zip tie next time.

Valve cover removal was more of a PITA than expected as well. Some corner or bolt constantly wants to sink back in and bind while you're trying to pull it out, and we're terrified to overly pry on the machined edge of the heads and damage them.

Thank you @kryptto for the advice to remove the passenger mount and put a block and jack under the oil pan. I truly don't know if it would've been possible to pull the crank pulley otherwise and it's so needed for the smidgeon of extra breathing room random bolts or cover removal requires.

1783124046369

Last thing we did today was finally get the cover off. Was another PITA equal to the valve cover removal. Factory or prior owner seemed to have slightly overdone the rtv and it was squeezed out of a few edges. Another scenario where we were afraid of picking the wrong pry location.

Definitely some stretch in the chain and slop in the pump gear, so makes me feel even better about being down in here. Tomorrow begins the teardown of the timing stuff. Few questions that if anyone know the answer to would be really helpful:

1) I didn't see any timing marks on the crank pulley, is it safe to assume it can go back in any rotation?

2) Putting the cover back on is growing more and more daunting. Any advice for how to get that cover back on without smearing freshly applied rtv all over the chains and other undesirable locations? I had to Jack up the engine to get enough angle to even pull it out

3) Any tips for rtv cleanup? I'm guessing razor blades will do but wondering if there's some super chemical explicitly for this

4) Reuse or don't reuse the high pressure fuel line going from the pump to rails? I've heard ford says no but people say you can, might just err on the side of caution since I definitely do not want a leak there.

5) Any tips for validation before turning the engine over? I'm increasingly paranoid with all these undone coolant fuel intake and electrical connections there's bound to be a leak somewhere putting this all back together. I suppose I could figure out how to pressurize the coolant to 15 psi but the thermostat being closed could hide leaks, boost leak test wouldn't be too hard, fuel maybe I turn the engine over a few times to see with the throttle in start button trick.

Thanks all, keeping on pushing this boulder up this hill but boy is the hill starting to look steep ahead when I peek around the boulder
 

Texas Marauder

Supporting Member
Supporting Member
Joined
Jul 20, 2007
Messages
915
Reaction score
827
Location
Lone Star State
1) I didn't see any timing marks on the crank pulley, is it safe to assume it can go back in any rotation?

Just install the crank pulley. It is a dampener, not a balancer. Use a proper tool to draw it on. Don't try to use a hammer.

2) Putting the cover back on is growing more and more daunting. Any advice for how to get that cover back on without smearing freshly applied rtv all over the chains and other undesirable locations? I had to Jack up the engine to get enough angle to even pull it out

Make two guide pins from 8mm bolts to "hang" the timing cover. Ford makes a set of alignment pins which probably fit the cover holes more precisely but, they are expensive for what they are. Long enough to stick thru the cover when in place. Locate them in the top two holes of the V. Do a dry run before you use the RTV to get a feel for how the cover fits.

3) Any tips for rtv cleanup? I'm guessing razor blades will do but wondering if there's some super chemical explicitly for this

Brake clean and judicious use of a razor blade and a bronze bristle brush (no steel). Scrape against the cutting edge so you don't gouge the surface.
 

luigisho

SHO Member
Joined
Nov 2, 2001
Messages
13,272
Reaction score
5,146
Location
va beach,va
Brake clean and judicious use of a razor blade and a bronze bristle brush (no steel). Scrape against the cutting edge so you don't gouge the surface.
This. Also I have recently used Goo Gone caulk remover for some shower valve project. You can use this and permatex or someone probably has one labeled for rtv specific application. Just make sure it gets cleaned/rinsed before reapplication of rtv.

As stated in post above, Bronze or brass bristle can be a huge assist with this stuff
 

WarrenBoostit

Member
Joined
Mar 17, 2023
Messages
75
Reaction score
18
Location
Minnesota
Few more questions:

1) Has Ford changed the crank pulley bolt part number or part? I know it's one time use, but the bolt I pulled out of the pulley was almost double the length of the bolt I bought. Seems like same amount of threads, but a bunch of blank metal after on the original. Somehow this is the part number I got through research and through the parts counter giving me an inventory for a timing job. I can't easily check the original bolt now because I don't want to risk moving the crank while the cams are locked unchained.

2) Is is worth swapping the timing gear on the crank? It's not listed on the parts desk timing job inventory but isn't hard to remove

3) I was hoping for a smoking gun in the water pump gasket, but outside some smudging near the weep, I am not sure I see it. I didnt really see weep hole leakage but I think I caught the pump very early. This is the old pump, anyone see any weirdness? It's interesting that on the old pump the turbine was made of plastic, but the new one is made of metal. I'm guessing this was a reliability update?

1783206643791

4) The cam phasers I got look identical to the existing ones, but I have the phaser rattle. I've heard the phasers were updated. Does the SHO not accept the updated phasers, or do I probably have them, or do I need to specifically hunt for updated f150 phasers?
 

Texas Marauder

Supporting Member
Supporting Member
Joined
Jul 20, 2007
Messages
915
Reaction score
827
Location
Lone Star State
The later crankshafts use a long bolt. You need to get a matching bolt to the original.

Crank gear is cheap. Change it.

New phasers rattle because they have never been pressurized. F-150 phasers are different and not interchangeable.

Careful when cleaning the block surface that you don't let debris get into the oil pan.
 
Last edited:

Forum statistics

Threads
107,129
Messages
1,181,684
Members
16,172
Latest member
defectivecyborg

Members online

No members online now.
Back
Top