

You are using an out of date browser. It may not display this or other websites correctly.
You should upgrade or use an alternative browser.
You should upgrade or use an alternative browser.
Oil in intercooler (CAC)
- Thread starter 13blacksho
- Start date
-
- Tags
- oil intercooler
Disclaimer: Links on this page pointing to Amazon, eBay and other sites may include affiliate code. If you click them and make a purchase, we may earn a small commission.

Rok
Member
Or an auto tank drain, a la air compressor tank.Time for an air-oil separator.

Pintony
Active Member
Okay... WOW! I did not know that my car was intercooled....So yesterday I finally got around to checking my intercooler for oil. 2013 non PP with 52,000 miles, figured it wouldn't be all that bad but I have always had that surge or misfire feel with low rpm, heavy throttle accelerations.
I didn't take a picture of the dipstick, but the oil was up to the first bump on there! This was before the car was jacked up on the drivers side.
With no idea how to get it out I tried a small pathetic squeeze pump from the parts store with no luck.
I consider myself pretty confident in the "Afro Engineering" department, and made this up...
View attachment 1707
The large tube from the left is my shop vac... I wasn't sure I wanted to post this picture because it is wildly ghetto! But hey, it worked Very well!!!
5 HP was plenty to get that THICK sludge and oil out.
Car drives 10X better now.
I know many have stressed this before but check this often!!!
Thanks 13blacksho!
P.S. How much gunk in on the inside of your shop-vac?

13blacksho
SHO Member
Okay... WOW! I did not know that my car was intercooled....
Thanks 13blacksho!
P.S. How much gunk in on the inside of your shop-vac?
It's hard to say, it was splattered everywhere! But given the amount on the dipstick, I would say WAY to much.
Have you purchased this rx feller and does it do what it says it should?Good going! Exactly how much did you get out, any idea? Pretty similar arrangement to this:
http://www.ecoboostperformanceforum.com/index.php/topic,3056.0.html
No I have not. People that have I believe had the most success when the catch can is mounted in the coolest location possible (like the front fender area in an X Sport), and also during winter time. Since the whole idea is to maximize condensation of catch can vapors, the cooler the better. Nice to have a kit that has a built in drain point too. Again, the experience will be variable with the SHO, it was definitely problematic with the F150s more often. If the intake tubes and intercooler are relatively free of oil (no pooling) & crud, most likely the catch can is not needed.
Also note, if you do find oil pooling, and you have a 2013+, you can ask your Ford dealer to see if you qualify for the upgraded valve cover fix for free. Since PCV is an emissions issue, if you are under the emission warranty mileage (80K (?) for most states, 150K for California if PZEV I think), it should be.
Also note, if you do find oil pooling, and you have a 2013+, you can ask your Ford dealer to see if you qualify for the upgraded valve cover fix for free. Since PCV is an emissions issue, if you are under the emission warranty mileage (80K (?) for most states, 150K for California if PZEV I think), it should be.
Last edited:
Appreciate your response. I have been pricing sho's,used that is, and this rx article kind of scared me a little. I am a total noob when it comes to turboed motors so thanks for patience. Aside from the already stated checks and replacement of fluids a buyer needs to add this to the list and make it a regular check. Great info 13blacksho.

Hebes10
SHO Member
No I have not. People that have I believe had the most success when the catch can is mounted in the coolest location possible (like the front fender area in an X Sport), and also during winter time. Since the whole idea is to maximize condensation of catch can vapors, the cooler the better. Nice to have a kit that has a built in drain point too. Again, the experience will be variable with the SHO, it was definitely problematic with the F150s more often. If the intake tubes and intercooler are relatively free of oil (no pooling) & crud, most likely the catch can is not needed.
Also note, if you do find oil pooling, and you have a 2013+, you can ask your Ford dealer to see if you qualify for the upgraded valve cover fix for free. Since PCV is an emissions issue, if you are under the emission warranty mileage (80K (?) for most states, 150K for California if PZEV I think), it should be.
Is there a valve cover upgrade (non-metallic cover, IIRC) for 2010-2012?
I did a quick Google search for Taurus SHO PCV TSB and found TSB 14-0113. That's applicable for the SHO from 2010-2014 according to what I found. According to the article the fix is a new valve cover and oil separator. Is this the same TSB you're referencing?Haven't heard of any. Probably would be if Ford had established a need. Also TBH I don't know what the differences are between the 2010-12 & 2013+ valve covers. Worth a trip to a friendly parts dept?

BlueSHO
SHO Member
- Joined
- Jan 19, 2016
- Messages
- 243
- Reaction score
- 79
Everyone keeps talking about this factory oil separator is there a picture of it or where it's located?
Sent from my DROID RAZR HD using Tapatalk
Sent from my DROID RAZR HD using Tapatalk
Does it? Goes to show what I knowI did a quick Google search for Taurus SHO PCV TSB and found TSB 14-0113. That's applicable for the SHO from 2010-2014 according to what I found. According to the article the fix is a new valve cover and oil separator. Is this the same TSB you're referencing?
Yeah thats the one. Thx for double-checking!The first two steps of the TSB are listed below. Based on the steps, it sounds like the separator is inside the valve cover since you remove the PCV and then inspect the separator through the opening.Everyone keeps talking about this factory oil separator is there a picture of it or where it's located?
Sent from my DROID RAZR HD using Tapatalk
1. Remove the positive crankcase ventilation (PCV) Valve. Refer to Workshop Manual (WSM), Section 303-08.
2. Inspect for oil in the crankcase vent oil separator through the PCV valve opening. Is there presence of liquid oil, more
than slight vapor?
Yeah, I was looking it up to see what were the differences in the valve covers. But I only found that one so wasn't sure if there was another one or not.Does it? Goes to show what I know
I believe the 14-0196 TSB is the latest revision for that issue.
http://www.revbase.com/BBBMOTOR/TSb/DownloadPdf?id=187145
The oil separator part is listed as AA5Z-6A785-F, I think it's the part the PCV Valve screws into?

Per the 2011 FSM:
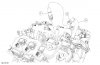
Item Part Number Description
1 6A666 PCV valve
2 — Crankcase ventilation tube-to-PCV valve quick connect coupling (part of 6C658)
3 6C658 Crankcase ventilation tube
4 6A785 Crankcase vent oil separator
Removal and Installation
http://www.revbase.com/BBBMOTOR/TSb/DownloadPdf?id=187145
The oil separator part is listed as AA5Z-6A785-F, I think it's the part the PCV Valve screws into?
Per the 2011 FSM:
Item Part Number Description
1 6A666 PCV valve
2 — Crankcase ventilation tube-to-PCV valve quick connect coupling (part of 6C658)
3 6C658 Crankcase ventilation tube
4 6A785 Crankcase vent oil separator
Removal and Installation
- Release the wire harness pin-type retainer from the crankcase vent oil separator.
- Disconnect the crankcase ventilation tube-to-PCV valve quick connect coupling. For additional information, refer to Section 310-00 .
- Remove the 3 crankcase vent oil separator bolts.
- To install, tighten to 8 Nm (71 lb-in).
- Remove the crankcase vent oil separator from the RH valve cover.
- To install, reverse the removal procedure.
BlueSHO
SHO Member
- Joined
- Jan 19, 2016
- Messages
- 243
- Reaction score
- 79
Got to save that info. ThanksI believe the 14-0196 TSB is the latest revision for that issue.
http://www.revbase.com/BBBMOTOR/TSb/DownloadPdf?id=187145
The oil separator part is listed as AA5Z-6A785-F, I think it's the part the PCV Valve screws into?
Per the 2011 FSM:
View attachment 1923
Item Part Number Description
1 6A666 PCV valve
2 — Crankcase ventilation tube-to-PCV valve quick connect coupling (part of 6C658)
3 6C658 Crankcase ventilation tube
4 6A785 Crankcase vent oil separator
Removal and Installation
- Release the wire harness pin-type retainer from the crankcase vent oil separator.
- Disconnect the crankcase ventilation tube-to-PCV valve quick connect coupling. For additional information, refer to Section 310-00 .
- Remove the 3 crankcase vent oil separator bolts.
- To install, tighten to 8 Nm (71 lb-in).
- Remove the crankcase vent oil separator from the RH valve cover.
- To install, reverse the removal procedure.

Sent from my DROID RAZR HD using Tapatalk
13blacksho
SHO Member
I believe the 14-0196 TSB is the latest revision for that issue.
http://www.revbase.com/BBBMOTOR/TSb/DownloadPdf?id=187145
The oil separator part is listed as AA5Z-6A785-F, I think it's the part the PCV Valve screws into?
Per the 2011 FSM:
View attachment 1923
Item Part Number Description
1 6A666 PCV valve
2 — Crankcase ventilation tube-to-PCV valve quick connect coupling (part of 6C658)
3 6C658 Crankcase ventilation tube
4 6A785 Crankcase vent oil separator
Removal and Installation
- Release the wire harness pin-type retainer from the crankcase vent oil separator.
- Disconnect the crankcase ventilation tube-to-PCV valve quick connect coupling. For additional information, refer to Section 310-00 .
- Remove the 3 crankcase vent oil separator bolts.
- To install, tighten to 8 Nm (71 lb-in).
- Remove the crankcase vent oil separator from the RH valve cover.
- To install, reverse the removal procedure.

I want to pull this off and inspect it... Is it as simple as it seems?
I removed mine a couple of months ago and washed it out with solvent. It is a simple removal procedure but the rubber grommets that go down into the valve cover are a little tricky to get out and back in properly.

So is this an issue on a 2015 SHO? I believe they redesigned the valve covers or something to either eliminate or reduce the problem. Is it something we should always be on the lookout for? If so how many miles would be needed on the vehicle to consider checking for this oil sludge crap in the intercooler?
Last edited:
BlueSHO
SHO Member
- Joined
- Jan 19, 2016
- Messages
- 243
- Reaction score
- 79
Yes according to the latest TSB the right valve cover gets changed also. Are they using a black composition like what's on my 16? If so what are they doing with the other valve cover and hopefully not leaving it aluminum for a mismatch. Also what's up with the 5w-20 oil in the TSB? Don't all SHO's use 5w-30?
Sent from my DROID RAZR HD using Tapatalk
Sent from my DROID RAZR HD using Tapatalk
Similar threads

- Replies
- 4
- Views
- 1K

- Replies
- 5
- Views
- 1K


- Replies
- 10
- Views
- 1K

- Replies
- 0
- Views
- 390


